By DoMyOwn staff
Want to know how to apply liquid insecticides around your home yourself? This video will show you how! One of the most common treatments pest control companies perform is the general insecticide spray treatment around the parameter of the home. This treatment is meant to kill most of the insect pests that crawl into your home.

Jim here with Do My Own dot com. We're going to talk about how to do a general pest control treatment around your house.
The first thing we need to do with any general pest control treatment is inspect the structure.
You're looking for openings or areas that are damaged or missing, where crawling pests could enter. Missing or torn window screens, large cracks in the foundation, around doors or window frames, loose or broken weather stripping, and door guards. Missing vent covers and broken soffits. All of these things should be fixed or replaced before doing your barrier treatment to keep pests from making your home their own.
Now it's time to put down our barrier treatment. This will kill any pest that crawl over the barrier before they enter your home.
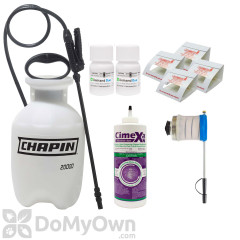
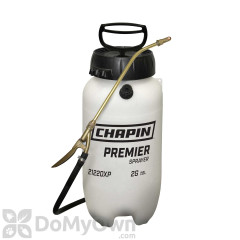
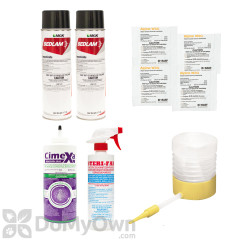
For the barrier treatment, you will need an insecticide of your choice. One, one gallon hand pump sprayer, water, long sleeves, safety gloves, long pants and closed toe shoes.
To use the one gallon pump sprayer, screw the hose onto the tank adapter. turn the pump handle counter clockwise to remove the pump so that the tank may be filled. Where gloves when mixing and handling pesticide such as nitrile chemical resistant gloves. Fill the tank one third to one half full of water, shake the insecticide well before opening, then add the recommended amount of insecticide per the label to the sprayer tank. Secure the sprayer pump and gently shake to agitate the tank to begin mixing. Remove the sprayer pump and finish filling the sprayer with water to the one gallon mark. Replace the sprayer pump and tighten securely harborage by turning the handle clockwise.
To pressurize the sprayer, turn the handle a quarter turn counter clockwise to release it. Then, pump until you feel resistance. Push the handle down, turn a quarter turn clockwise to lock in place. Now you're ready to spray. Re-pump the sprayer as needed during application to maintain pressure. Turn the end of the nozzle to adjust the spray pattern from a pin stream to a wide cone spray.
Now we're ready to spray. Here are the areas to apply the insecticide.
Three feet up the foundation and structure and three feet out onto the ground in a continual band. Around door frames and window frames. Around areas where cables, pipes, wires enter into the structure. Around vents and soffits. Behind down spouts and shutters and any other entry points into the home.
Here are some things to remember when doing your application.
Apply as a coarse spray to uniformly wet the foundation and or band area so that the insecticide will reach the soil or thatch level where pests may be active. Before application, remove debris and leaf litter from next to the foundation. Cut back vegetation branches that touch the foundation, and move or rake back rocks, deep mulch, or other potential pests harborage next to the foundation. You will want to rake back the ground cover at least six inches from the home before spraying. This allows the solution to penetrate down in the ground and reduce areas where pests can harbor.
If you add new ground cover every year, remove the old ground cover before you add new ground cover to prevent organic material from building up that can attract pests. Over grown trees, landscape, shrubs that are touching the sides of the house needs to be trimmed back or removed completely. We want to trim those back at least two to three feet from the structure to make sure pests cannot climb onto your landscaping or onto your home, by passing the barrier treatment we're going to be putting down.
You also want to look for and remove free standing water and check gutters. If those are blocked, clear them out so water can't backup and become a home for pests.
A couple of things to keep in mind when spraying an insecticide as a perimeter barrier treatment. Do not spray to the point of run off. Keep pets and children out of the treatment area while spraying until the application is dry, which is usually about one hour.
Best time to apply is when the weather is calm and rain is not predicted for the next 24 hours. This will help insure that the wind and rain does not blow or wash away the treatment. After use, spray some clean water through the tank outside as a rinse. If you leave the solution sitting in the tank for a prolonged period of time, re agitate the tank before spraying. Do not leave in the sprayer over night.
If you've seen pest activity inside, you'll need to apply liquid insecticide there as well.
Minimize where you spray by focusing on cracks and crevices in areas where pests may hide. And not spraying across large areas or carpet or floors. Remove children and pests from areas being treated until the sprayed has dried. After it's dry, it is safe for them to re-enter.
Spray around door frames and thresholds, spray around window frames and window seals, spray under appliances like refrigerators and dish washers, stove, oven, spray under washers and dryers. Pests are common in bathrooms so make sure to spray behind toilets and where pipes enter the walls. Make sure to spray in areas where utilities enter the structure.
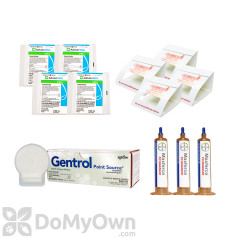
After the liquid insecticide has dried, it's time to apply the dust.
Using insecticide dust can be very messy, so be sure to wear gloves and consider having a moist towel handy to clean up access dust.
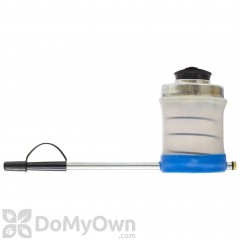
To fill the bellow hand duster, remove the black rubber stopper at the top of the duster. Then slowly tap the dust into the duster. Fill the duster up half way or less, so that there's plenty of room for the dust to move inside the duster. You may want to add a few small objects such as coins, pebbles or marbles to prevent the dust from clumping. Replace the black stopper so that it fits snugly into the opening. Remove the black rubber cap from the end of the extension wand.
To apply the dust, hold the duster upside down so that the extension wand is on the top. Gently squeeze the below between the thumb and fingers.
Apply insecticide dust in cracks and crevices outside around windows and door frames, around areas where cables, pipes and wires enter the structure and any cracks and crevices or gaps where pests can enter.
Indoors, dust can be used in cracks and crevices where the dust is not easily removed or disturbed. Make sure to dust behind outlet switch covers, under baseboards, and around pumbing and pipe collars. Like around toilet pipes and pipes under kitchen and bathroom sinks. Also make sure to dust under and behind cabinets.
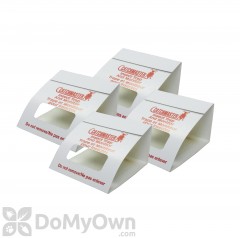
Now that we've sprayed and dusted, it's time to put out monitor traps.
Place the glue traps in areas where insects may hide, travel or breed. Such as under cabinets, behind toilets, under appliance or in corners. If desired, remove the cover sheet of the bottom of each trap to expose the adhesive. Press firmly to a clean, dry surface to secure the traps in place. Make sure to monitor traps weekly to check your progress, and replace the traps if they're full of insects, dust or other debris.
Those are the basics behind a general pest control treatment. And it's that easy with the expert help of Do My Own dot com.