By DoMyOwn staff
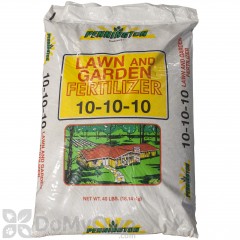
The garden has really taken off! Side dressing each plant with some 10-10-10 fertilizer really gave them a boost. So much so, that the tomato plants have started to grow outside of their cages. In this video we will go over some general maintenance tips that will help insure that the plants continue their growth. We will cover support structures, tying plants to the support structures and pinching off suckers.
So, yeah! These things have grown significantly since the last video!
The last video, I think they were just starting to peak their heads over the cage. Now you can barely even see the cage and they're growing significantly out of the cage. Especially our Sweet 100s over here. Our early girls, they were still kind of low and bushy, but they've grown significantly as well since we've added that fertilizer.
The other thing to note is that the plants are looking really really healthy. Really healthy green leaves. Turn them over, there's not a whole lot of tears, or holes, signs of pests making their way in. Leaving egg sacks growing on the back. They're looking really good.
These peppers are still growing nicely!
The other peppers are starting to pop out as well.
And...we're starting to see some tomatoes popping!
That fertilizer really gave these plants a good boost! That coupled with all the rain that we've continually been getting, it's really helped make out plants thrive. I don't think any of us were expecting these plants to grow at the rate that they are.
Another thing that really helped us is having a really good soil mix to start out with. Although that soil is on the expensive side, it's packed with a lot of good stuff that's really kicked started this garden. That coupled with the 10-10-10 fertilizer we've side dressed each plant with, and the rain that we continue to get, has really brought this garden to life. And this is a really good opportunity and time to talk about some general maintenance tips.
Let's first talk about the support structures. Some people would have probably already bought taller cages or driven stakes into their bed to get the plants to grow up. To be completely honest with you, we didn't know how these plants would do, or grow, which is why we just started out with our standard store bought tomato cages. You can find these in most garden centers and they're usually in a down ward tapered cylinder shape and made of wire. And these are fine for smaller bushy determinate type tomato plants but they'll quickly be over taken with indeterminate tomato plants.
And that brings up a good point, you need to know whether you're planting determinate or indeterminate type tomatoes because that will determine the type of structure that you want to build or put in your raised bed.
Determinate will only grow to a specific length or height and then they'll stop. Determinate tomato plants have been breed for stems that only grow to a certain length. And indeterminate are vine like and keep growing until freezing stops the growth.
Back to the type of structures you can use, you can obviously go out and buy your own wire and make cages as tall as you want. Wire fencing or concrete reinforcing mesh would be perfect for that, you would roll them up into a cylinder, stick them in your bed, and make them as tall as you want, I would just make sure to leave enough room to stick your hands in between each section so you can prune, fertilize, and just generally take care of your plants.
I've seen people build really extravagant trestle systems for their garden beds. Really there's a whole bunch of different ways that you can build a support system for your tomato plants to grow up. And that is one of the main goals of a support structure, is to promote healthy up ward growth of your plants.
Not only that, support structures are going to help you avoid disease problems, its going to help you harvest the fruit one you get to that point, it will help you keep fruit clean, it will give you something to support the plants to as the fruit grows and gets bigger, and it will help you just over all monitor the garden bed and help you avoid problems in the future.
Now that our tomato plants have pretty much completely out grown the cages, to continue our up ward growth, we're going to use one of the tried and true methods of gardening, wooden stakes.
Now the extension office recommends that for determinate varieties use a one inch by one inch by four foot stake and pound it into the ground at least six to eight inches deep, near the base of the plant.
For larger tomato vines they recommend you use a two inch by two inch by seven foot stake and pound it at least 14 to 16 inches into the ground, near the base of your tomato plant.
Now obviously you can tailor this to your particular needs. In our case, we have a foot tall raised garden bed, our tomato cages are four feet tall, I want to try and get an additional four feet above the tomato cage so that I really get those plants continually growing up.
Most garden centers are going to sell stakes already cut and made that are about five to six feet tall. If we were to use those, we lose a foot in our raised garden bed, because we want to drive them down a foot, four feet are going to be taken up by the tomato cage, so that's five feet, leaving us only one foot on top for the tomatoes to grow up. Simply not enough in my opinion. So I went and bought eight foot tall one by threes and I just cut points on the end to drive them down into the garden bed.
As for where we drove the stakes in, what we did was we found the main branches or stems of the plant, and we came out just outside of those, and drove the stake down near those. Because that's the main branches, that's where main growth is coming from, that's where we want to give the most support.
Important to note that we didn't get right up on the base of the plant. We came just outside of it pretty close to our cage, and the reason we did that is we don't want to drive down into the main root system, and risk damaging our plant, or even killing it.
Well we're defiantly not going to get any awards for the way it looks! But I've heard it said that good gardening is not about esthetics, and all about the yield. And that's what we're going for, is a good yield from these tomato plants.
As far as the lumber is concerned that I used, again I stayed away from pressure treated lumber, because I didn't want to risk those chemicals leeching into the soil and damaging my plants. So I went with untreated one by three, eight foot pieces of wood, cut points on the end of them so that I could drive them into the bed, and that's what we've got! There's our stakes.
Now this leads us to the next topic, tying off our plants to give them better support.
Now typically what we would do is take our limbs and tuck the back up under the cage so that they can grow on the cage, over it and lean up against them and have a support system. But these limbs have gotten so big that if we tried to do that, they would snap and we would damage our plant. So the next thing that we're going to do is take some bailing wire or jute or some kind of tie system and tie them to the cage so that they can be supported.
Right here's a good example! Where there's flowers there's potential fruit. If that fruit does produce right there, it could potentially get really bi, weigh this branch down, and snap the branch off, thus damaging the plant. So what we want to do is take this branch, and tie it to our cage so that it's supported. So that it doesn't snap off and we end up losing that fruit. We want to go around to each one of our tomato plants and do that. Just tie up any loose limbs that could potentially have fruit on them, so that they don't snap off, and we get as much fruit as possible.
Now there's different materials you can use to tie up your limbs, your stems or your branches. You can using bailing twine, you can use jute, I even heard of some people using panty hose. And this brings up a good point, whatever you use, you want to make sure that you tie it loosely to your support system.
And what I mean by that is you don't want to tie it really tight like you would a shoe lace. If you tie it tight like a shoe lace to the support system, if that limb continues to grow, it's going to be suffocated or cut off in that particular area. Meaning it can't grow and you can potentially damage the plant.
So all I'm doing is taking our twine, I'm finding the branches that could potentially snap if they grow too big; I'm just gently running that twine around it, and tying it to the support system.
So we're not pulling the branch all the way up to the cage but we are pulling it some, so that as that fruit grows, the weight is supported by our support system. Again we don't want those fruits grow, get heavy and cause the branch to get weighed really down and snap off, damaging the plant.
Now we don't have to do this on every limb of the plant but we want to make sure we do it on the limbs that are potential fruit bearing limbs. So we'll just go around to each one of our tomato plants, check which limbs potentially have fruit growing on them, and we'll tie them up to our support system.
Our limbs are tied up, the stakes are driven in, there's one other maintenance tip I want to go over. Pinching off suckers.
Now one of the main reasons we prune or pinch off suckers of a tomato plant, is because it can maximize the size, the number and the flavor of our tomatoes.
Tomato plants at the start produce a whole bunch of energy fueled by sunlight. For the first several weeks in the garden, before our blossoms emerge, tomato plants put their energy into growing new leaves. To support those leaves, new branches emerge. Suckers are new branches that grow out of the tomatoes main stem. They grow right about a leaf branch or side stem or, for lack of better words, in the crotch of those two.
As tomato plants continue to grow and they continue to get bigger and out grow your cages and your support systems, they produce even more energy and more leafy growth. And that's why they continue to put out stems or suckers throughout the season.
Now suckers that are still pretty young and small with in those V's or those crotch areas, they're pretty weak. They produce inferior fruit, if they do fruit, and, more importantly, they draw away energy from the main stem of the plant. And that's something we don't want.
By pinching off those suckers, we insure that we leave the energy in the main stem of the plant. Again those suckers they're most likely not going to produce fruit, we don't want to waste the energy in those. We want it to stay in the main stem and make sure we get all that energy to where we know fruit is going to grow.
All you have to do is carefully grasp the base of the sucker between your thumb and your fore finger. Literally pinch it and bend it back and forth gently until you get a nice clean snap.
The reason we're going to use our fingers to pinch them off versus some clippers or some pruners or a knife, those pinch wounds heal very quickly and nicely.
Once you've you pinched off those suckers simply throw them away in a trash can, incinerate them, do what ever you got to do to get rid of them and keep them away from your healthy tomato plants.
Good garden sanitation, you don't want anything decaying next to your healthy, thriving plants. The last thing we want are bugs crawling to that decaying matter only to find our healthy growing plants, crawl up them, find our nice yummy tomatoes, and eat them.
So that's basic general maintenance tips for a raised garden bed. We'll monitor our growth and as they continue to grow up ward, we'll tie them to our stakes to insure that they do in fact continue to grow up.
We're seeing some tomatoes pop, peppers are continuing to grow, things are looking really good.
If you have any other further questions on things that we've done today in this video, leave them in the comments section below, or email our customer service staff, or pick up the phone and give us a call.
Make sure to continue to follow along with us by clicking this button to subscribe to the channel. Click this play list to see all the videos in the Do My Own Gardening series. And click this play list to see all the videos in the Do My Own Lawn Care series.
And as always, thanks for watching!