
Have a Question? Ask Our Pros!
Average Rating
There are no reviews for this product yet. Be the first.
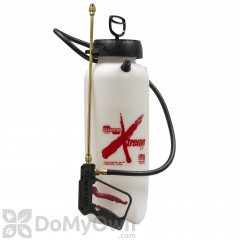
Lawn & Garden TriPoxy Steel Plus Sprayer (31420) is another Chapin sprayer that is excellent value. Like the rest of the Steel Plus Sprayer line this product has an ergonomically pump handle and wand that make fatigue from prolonged use of the sprayer a thing of the past, a sturdy stainless steel tank that will stand the test of time, synthetic rubber seals strengthening Lawn & Garden TriPoxy Steel Plus Sprayer (31420), an easy-to-fill and pour tank and a Chapin SureSpray filter helps to keep the sprayer free from debris.
The Chapin 6-4619 Replacement Pump Part (#6-4619) is the replacement pump for the Lawn & Garden TriPoxy Steel Plus Sprayer (31420).
Product Documents
| For use in | Home & Garden areas |
|---|---|
| Application | Place your liquid: from Fertilizers, Fungicides, Herbicides to water; pump the sprayer and spray on the desired surface. |
| Tank Size (gal.) | 2 gal |
| Shipping Weight | 6.00 lbs |
| Manufacturer | Chapin (Mfg. Number: 31420) |
| UPC | 023883314200 |
DIRECTIONS FOR USE
1. Hose to Tank -
Make sure hose is pushed all the way to the tank. Make sure hose clamp is tight and below the hose barb. Turn clockwise with a screwdriver to tighten.
2. Nozzle -
Attach nozzle to shut-off handle or extension wand.
3. Pre-Use Check -
1) Check tightness of hose nut to be sure hose is securely attached to the tank outlet.
2) Inspect hose for deterioration, cracks, softness, or brittleness. If any of these conditions are found, replace hose before using. Replace with original manufacturer’s parts only.
3) Remove pump (see Filling, Pressurizing and Spraying Instructions), inspect interior and exterior of tank for signs of deterioration of body and bottom. Any sign of deterioration indicates possible tank weakening and could result in explosive bursting under pressure. If any of these signs are found, discard tank immediately and replace. Do not attempt to patch leaks, etc., as this could result in serious injury.
4) Follow Filling, Pressurizing and Spraying Instructions, except use water only.
5) Pump plunger 8-10 strokes and inspect for leaks.
6) Direct shut-off away from you and open to make sure discharge is not clogged.
7) If unit passes this test, release pressure (see Pressure Releasing Instructions), empty tank, and proceed with Filling, Pressurizing and Spraying Instructions.
4. Filling -
1) Turn pump handle counterclockwise and remove pump
2) Prepare spray solution following all directions and safety warnings on chemical label.
3) Fill tank to no more than the proper gallon marker. Do NOT overfill to accommodate pump.
4)Check pump to make sure that no grass or dirt is stuck to barrel. Replace pump in tank and tighten securely.
5. Pressurizing and Spraying -
1) Turn handle clockwise to tighten. Push handle down, turn 1/4 turn counterclockwise to release.
2) Pump until you feel resistance.
3) Push handle, down, turn 1/4 turn clockwise to lock. Begin spraying. Re-pump sprayer as required to maintain spray force.
4) Adjust spray pattern by turning nozzle cap. Do not turn cap more than 2 turns or cap may come off allowing spray material to spray back on you.
6. To Release Pressure
1) With pump facing away, turn locked handle counterclockwise until air begins to escape. Stop turning handle when you hear air escaping.
2) Stay away from the sprayer until all air has escaped.
7. Care, Storage and Maintenance
1) Rinse tank thoroughly with water only, empty, refill with water. Follow Filling, Pressurizing and Spraying Instructions, except pump unit only 8-10 strokes.
2) Open shut-off and allow water to run through discharge assembly.
3) Release pressure (Follow Pressure Release Instructions), remove pump and empty sprayer.
4) Store sprayer tank upside down, with pump removed, in a warm dry location.
5) Periodically oil pump by dropping 10-12 drops of light oil down pump rod through opening in cover.
8. Fatigue-Free Spraying
For constant spraying, push down on shut-off handle and move grey locking mechanism away from you. To release, squeeze handle and move the grey locking mechanism back towards you. (Not all models are provided with this feature).
9. Troubleshooting - Tank pressurizes but does not spray.
WARNING: Release pressure in tank before troubleshooting.
Clean shut-off -
1) Pull handle straight up.
2) Insert notches from underside of handle into plunger grooves and turn counterclockwise.
3) Remove plunger and diaphragm. Clean plunger, diaphragm and body. Flip diaphragm and replace.
4) Tighten plunger clockwise until flush to top of shut-off body. Do not over-tighten or unit may not spray.
Clean Nozzle Assembly -
1) Remove nozzle cap. Clean and re-assemble
There are no reviews for this product yet. Be the first.
There are no questions for this product yet. Ask the first.