By DoMyOwn staff
One thing home owners fear the most are the chance of termites or other wood boring insects getting into their home and causing thousands of dollars worth of damage. A really good way to prevent this is to perform your own Borate Wood Treatment using a product like Bora-Care.
Today we're at a new construction project where all the walls are exposed because the drywall hasn't been hung yet, and we're going to do a Bora-Care treatment or borate treatment on the wood because it's the best time to treat the wood to prevent all wood destroying insects such as termites. And the good thing about a borate treatment is that it lasts forever.
[Music]
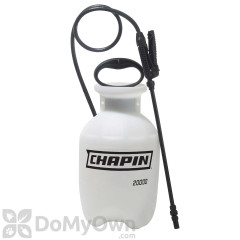
For today's treatment we're going to need a 1 gallon Chapin premier pump sprayer. Optional is the use of a 4 gallon battery backpack sprayer. This will allow you not to be pumping and allow automated spring through the whole process which will save you a lot of time. We'll need a 5 gallon mixing bucket. We will need a jug of water 2 gallons. We will need safety equipment which includes Tyvek coveralls gloves, eye
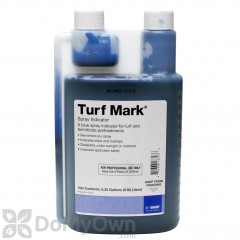
Protection, and a respirator if you're gonna get into crawl spaces. And we suggest that you mix the product with a mixing wand with a corded or cordless drill. And today we're gonna use marking dye in order to mark the product so we know where we've sprayed.
Ok so just to explain what we're gonna do here today is we're gonna treat all this exposed wood from the sill plate up to 2 feet high with Bora-Care. And the reason we
want to do this is this is where wood destroying insects enter such as termites, so we're gonna want to make sure the sill plate is really treated well and spray really well around anything like an outlet cover but make sure we cover these outlets so that we don't get
any overspray inside the outlets.
So, before we get started the first thing we're gonna need to do is clear any of this debris away, like sawdust, because Bora-Care not only sits on the surface, but really soaks in and absorbs into the wood. That's what makes Bora-Care so strong; is that it actually absorbs into the wood. That's why it lasts forever.
[Music]
What we have here is that we have an electrical box or low-voltage box for electricity or data and we don't want to get any Bora-Care in here especially since we're using the dye, so I'm just going to use this piece of material to cover that up. You can use tin foil, anything you want and just stick it in there and cover the wires so that when the workers come back to pull them out they won't disturb anything or get anything on their hands.
So one question we get a lot is how do we know how much Bora-Care do we need to
buy to complete our job? Well this is how you figure it out. We're going to use a measuring wheel and we're gonna measure the lineal feet of the entire house.
After you've measured all exterior walls, interior walls, and interior rooms you're
going to come up with one figure: you're going to take that figure divide it by 100 and that's exactly how many gallons of Bora-Care you'll need to complete your
job.
Now that we've got our calculations of how much we need we're going to go ahead and mix up some Bora-Care. Bora-Care is mixed at a one-to-one ratio, so we're gonna mix one gallon of water to one gallon of Bora-Care. That's gonna give us two gallons of finished product, which treats 100 lineal feet.
The first step is I'm going to put three quarters of a gallon of water into this bucket. After I get three quarters of a gallon in the bucket, I'm going to start entering the Bora-Care into the bucket.
So now I'm going to put my drill in. We can see how thick Bora-Care is… it's extremely thick – that's why we want to agitate with mechanical.
[Music]
Okay, so I started with three quarters of a gallon so I still have a quarter of a
gallon left so what I want to say that last quarter for is doing a triple rinse. What I'm going to do is pour a little bit of this water into the one gallon bucket, because this product is so thick and it sticks to the sides and the walls. Then we want to shake the product up. We want to get all the product we can out of this one gallon bucket, so we're gonna triple rinse it – so we're gonna do this three times.
Nice and clean. So now we want to continue mixing our Bora-Care.
So today we're gonna add a marking guide to our two gallon finished solution, so we
can see exactly where we've sprayed. And this particular marking dye is mixed one
half ounce per gallon, so we have to finish two gallons. I'm going to add one ounce of marking dye.
[Applause]
We're ready to add the product to our sprayer. Just a note on marking dye, the
marking dye will dye this sprayer, this plastic sprayer, and the dye no matter
how well you try to clean it will remain in this sprayer. That's why we recommend
using a cheaper sprayer or something that you can just dispose of after the
job is done.
And fill it up to the 1 gallon mark, close our sprayer and now we're ready to
get started.
Right here we have a piece of mahogany that's against the wood that
we're getting ready to treat, and because we have the dye in it we don't want this
dye to get on this finished piece of wood. There's going to be other places in
the house where you're gonna have similar situations and so what we're
gonna do is we're gonna use a piece of cardboard to shield this wood so that we
don't stain it. And getting ready to spray and again, I want you to remember we're
spraying 2 feet up we're spraying all exposed wood surfaces so this plywood
get sprayed as well. And we want to make sure this sill gets treated, and we're
gonna spray until it's really good and damp.
[Music]
So now we've sprayed one section of wall. I'm gonna go back through and look for
sections I might have missed or sections that might be light, and hit them again
real quick.
All right, normally in this situation we'd now be ready to treat the outside, but let's take a look at what we have outside. Well when we get outside, we can see the siding has already been installed. When this happens, you need to do a second application on the interior wall. You can only do a second application per the label after 20 minutes so while we wait 20 minutes or 30 for that to dry, let's go ahead and take a look at some other situations.
So here's the area that we showed you before where I shielded the mahogany from getting overspray on it. So what we're going to need to do in order to treat this wood is we're gonna have to use a paint brush and apply with a paintbrush, so that we don't get it on that finished product of mahogany. This product is brushable and rollable, so when you get into a situation like this where you can't get up against it with the sprayer, you can use a brush or roller.
Ok so I'm going to use a piece of cardboard to cover up this mahogany that we just cut in with a brush, and I'm gonna spray this corner. And as you can see there's a good gap in here, so I want to put the sprayer right in that gap and put a lot of material in there to make sure I get everything covered really good in there, and then I'll just continue spraying the rest of this void. And as I get closer to this right side what I'm gonna want to do is switch my piece of cardboard shield over to this side so I keep the overspray off the mahogany, and spray these voids and continue spraying this corner. Again outlets we want to make sure we spray extra-heavy around and spray that sill plate really really good, because if we get wood destroying insects or termites, that's where they're gonna come from.
Ok now we're getting ready to spray around this window, and before we do that again
we want to make sure all the debris is cleared off all the surfaces they're gonna be sprayed, so that the Bora-Care can really soak in and penetrate the wood. so we want to make sure all the dust is really away from the bottom of this sill plate and away from the top of the sill plate.
And as you'll notice there's some unfinished wood on these windows that we don't want
the marking dye to stain, so what I'm going to do is I'm going to use our trusty cardboard shield to shield off that and then take the sprayer and spray underneath the window.
So we finished with this room, and what I want you to do is pay close attention to
window, door frames, electrical outlets, and voids where two by fours aren't exactly together. Spray them really well and then you're going to want to repeat
this process for the rest of the structure.
[Music]
This is where we first started our treatment this morning, and what we're going to do is go back and put a second coating on this because remember on the outside of this wall the siding has already been installed. And when the siding has already been installed, the label calls for two coats to be done on the inside. So we're going to go ahead and give this our second treatment it's been way past 20 minutes – plenty of time to dry.
[Music]
We found a section of the house where the siding has yet to be installed, so what we're going to do is we're going togo ahead and treat this while we still have access to it. We're going to pull back this tie back, treat underneath this window and that way we only have to treat the inside of this wall one time.
[Music]
Well that's all there is to do in your own wood borate treatment. If you have any other questions, please give our customer service staff a call. Make sure to subscribe to our channel by clicking this button, look at our other product videos by clicking on this playlist, and check out our other DIY videos by clicking this playlist. And it's that easy with the professional help of DoMyOwn.com