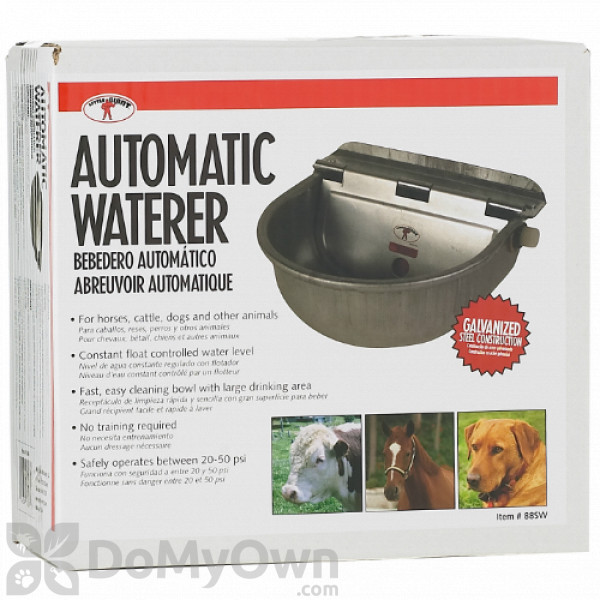
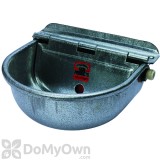
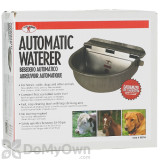
Little Giant Galvanized Steel Automatic Stock Waterer
Price/Ea.
$52.40
Buy 2 or more: $50.69 each
Have a Question? Ask Our Pros!
Email Our Pros
We're here to help
Offline. Leave Us a Message
You May Also Need
-
Product Overview
Little Giant Galvanized Steel Automatic Stock Waterer is an all-purpose waterer that works well for horses, llamas, alpacas, cattle, hogs, and even dogs with no training required. It features an easy cleaning bowl that is formed from heavy-gauge galvanized steel for heavy duty use. It has an adjustable float control to maintain a constant water level. It safely operates between 10 psi to 70 psi and can be easily installed at any height using U-bolts or lag bolts. It will fit a half inch pipe with a right or left connection.
-
Details
For use in Horses, Cattle, Hogs, Sheep, Goats, Dogs, Llamas, Alpacas and other Animals Dimensions 10.00 x 10.75 x 5.50 inches Color Uncoated finish Material / Construction Galvanized Steel Parts Included 1 Waterer bowl assembly
1 Float assembly
1 Mounting plate
2 Neoprene washers
1 Square plastic plug (already assembled)Shipping Weight 6.00 lbs Manufacturer Miller Manufacturing Company (Mfg. Number: 88SW) UPC 084369000888 Mounting Instructions:
NOTE: The waterer is shipped with the float assembly installed on the right side of the waterer bowl. The float assembly can be installed on either side of the waterer to best suit your application. Carefully remove the square plastic plug and the mounting nut and fibre washer from the float assembly. Reinstall the float assembly on the left side and the square plastic plug on the right side of the waterer before proceeding.
- Mount the waterer to a flat rigid surface like a stall, fence, or post with the mounting surface (back) of the waterer bowl as vertical/plumb as possible. For additional protection against damage from animals, mount the waterer near an inside corner if possible. Note: The waterer must be properly mounted to a vertical surface. The waterer will not work properly laying on the ground.
- Remove the float pin and float/arm assembly from the waterer to gain access to the mounting holes.
- Use the water bowl to measure and mark the mounting holes at the desired mounting location.
- Drill a hole in each of the two (2) marked locations. a. If mounting the waterer with 3/8” lag screws, use a 1/4” diameter drill. b. If mounting the waterer with 3/8 - 16 through bolts, use a 13/32” diameter drill.
- Install the waterer as shown. Always use the mounting plate provided.
- Tighten the lag screws or through bolts securely and reinstall the float/arm assembly and pin.
- Wrap all supply line pipe thread connections (including the threads on the valve) with Teflon thread sealing tape and connect the water supply to the float assembly. DO NOT over tighten any fitting or supply line connection.
- Check to make sure the waterer fills and shuts off properly.
- The water level is preset at the factory; however, minor adjustments can be made to increase or decrease the water level in the waterer if desired. To adjust the water level, remove float arm assembly by pulling out the connecting pin, loosen the float mounting screw and nut with a screwdriver, then rotate the float arm up or down to achieve desired water level. Make sure you re-tighten the mounting screw and nut securely.
CAUTION:
Rotating the arm too far up or failing to secure the float mounting screw and nut may prevent the waterer from stopping the water supply flow and run continuously.
OPERATING TIPS: If the water flow does not stop.
- Make sure water supply pressure is below 50 psi.
- Make sure float arm moves up and down freely without binding.
- Make sure float is not hitting the metal float cover when closed.
- Remove float pin and float arm assembly:
a. Check for water inside the float. Replace SW23 float if necessary.
b. Remove any debris from valve tip or valve seal and test.
c. Replace SW8 seal and test. (An additional seal is provided on the side of the float arm)
d. Check SW20 valve tip for chips, surface imperfections, or cracks. Replace valve if necessary.
-
Product Documents
-
Customer Reviews
-
Questions & Answers