By DoMyOwn staff
Paul discusses indoor grow lights for your gardening needs. Warm versus cool, LED versus fluorescent, how long you should keep your indoor grow lights on.
Not much we can do out here with it being all rainy and muddy and wet and nasty. So, let's go inside and chat and check up on things.
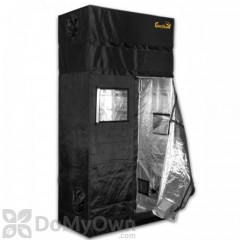
Over all things are looking pretty good in our grow tent here. These plants are starting to sprout up and they're looking pretty healthy. Still a little bit leggy. More leggy than I would like but we do have some good sprouts going there. Marigolds are doing pretty good on the top here. But the Marigolds on the bottom are probably doing the best out of all of our trays as you can see. Our plants on this side, they're really tall and leggy, but this additional light that we've hung up here is helping out a lot.
Our zucchini and nastersh...nastershurm..nasturtiums..I...I don't know how you say that. Anyway, however you say that, these two cell flats, they're doing really well. As you can see, they've out grown the grow lights inside the grow tent, so we had to move them into the office here underneath our studio light right here. So, that's a good segue to what we want to discuss for this video, lighting setups for growing plants indoors.
Alright, so lets get into this. The whole reason for starting seeds indoors, is control. You have the ability to keep pests away from your plants, you call the shots on the weather and, what we're talking about today, lighting is under your control.
Obviously if you've got a greenhouse, you're getting the sufficient amount of light that you need. An old school way of growing seedlings indoors is placing them in a south facing window. The problem there, that's probably good for one or two seedlings, but if you've got an entire cell flat like what we've got, you need an indoor grow light setup, which is what this video is all about.
You have your traditional lighting like incandescent florescent bulbs. Both of those are pretty economical options, but incandescent bulbs, they're fairly weak and can't support the growth of seedlings, plus they usually don't come in the correct light spectrum.
On the other hand, florescents could work but you have to leave them on for a much longer period of time, and you've got to place them inches above your foliage.
When researching lights, your going to come across two main options when it comes to light spectrum. Warm and cool.
All grow lights have a number associate with them. Most often in the thousands and usually you're going to find them between 2500k and 4000k, and this refers to the warmth or coolness of the bulb. The higher the number on the grow light, the cooler it's going to be, and if it's lower, it's going to be warmer.
Now most plants need anywhere between 2500k and 3000k to produce flowers which will turn into fruit later on. To grow seedlings or leafy green vegetables, grow lights on the higher end of the spectrum should do the trick. If you're wanting to grow flowers or fruiting plants like tomatoes, grow lights on the lower end of spectrum is what you'll need.
There are three kinds of grow lights that you can buy. Florescents, LEDs and HIDs. Let's first talk about florescent which are usually the cheapest.
These lights are often refereed to or labeled as a t12 bulb and are close to the same naturally light as a window. The down side to these types of bulbs, they are fairly weak which means you have to place them really close to the seedlings for them to do any good.
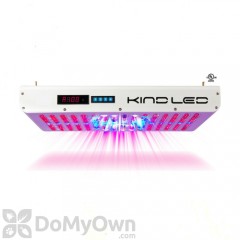
Now onto LED lights and these are typically more expensive than florescent. One of the biggest benefits is they last much longer and use half the electricity than florescent. They also typically have a much greater light intensity and if you have a large quantity of seedlings, they're usually the best option because you get a higher light intensity per square foot. And the other biggest benefit from LED grow lights is that they produce very little heat.
And lastly, HID, or high intensity discharge grow lights. Now these are the most powerful and the most expensive out of the three options. And because they're so powerful, they're going to consume the most electricity. They also produce a lot of heat and they usually require some kind of specialized track or light fixture to hang them from. The upside to these kinds of lights is that they can penetrate much deeper into the leaf foliage, more so than LEDs and florescent. So these are perfect if you're growing large plants like lemon bushes.
Now each one of these different kinds of grow lights are going to be installed slightly different from each other. You'll need to come up with a light track to support the type of light that you choose. What ever your setup ends up looking like, the main goal you want to achieve here is the ability to raise and lower the light as the plant grows.
And as your plants starts to grow, you want to raise the light with them, making sure to still keep them just inches from the top of the foliage. Having said that, each light does have an optimal distance. Fluorescent grow lights should be about 3 to 12 inches away from the foliage, LED 12 to 24 inches and HIDs 24 to 60 inches.
One more thing that you should consider buying with your lighting setup is a timer to turn your lights on and off automatically, this way you can really make sure your plants get the proper amount of light each day. You could just do this manually and keep track or how much time your lights are left on, but one thing you really want to make sure and not be tempted to do, is leave your lights on 24/7.
If you're growing edibles like what we have in our grow tent, your seedlings and your plants are going to need about 14 to 18 hours of light each day. Also make sure to give them about 6 hours of darkness each day to really help them thrive.
So in a nutshell, that is indoor grow lighting for your indoor gardening setups. If you want to know more about the lights that we're using in our grow tent, I'll make sure to link those in the description box below so you can click over to Do My Own dot com and read more about those.
If you have any other questions, leave those in the comments section below, email them over to the customer service staff, or pick up the phone, give them a call.
We still got a bit of maintenance work we got to do on our seedlings, we're going to have to transfer some to bigger pots, we got to get our soil ready for our bed, we got a bit of work to do. But those are all videos for another time so make sure to subscribe to the channel by clicking this button right here, you can click that playlist right there to see all the videos in the Do My Own Gardening Series and click this playlist to see all the videos in the Do My Own Lawn Care Series.
And as always, thanks for watching!