Earthway 2030 Homeowner Broadcast Spreader

Earthway 2030 Homeowner Broadcast Spreader
Price/Ea.
$114.37

Have a Question? Ask Our Pros!

Email Our Pros
We're here to help
Offline. Leave Us a Message

You May Also Need

Average Rating

There are no reviews for this product yet. Be the first.

Product Overview

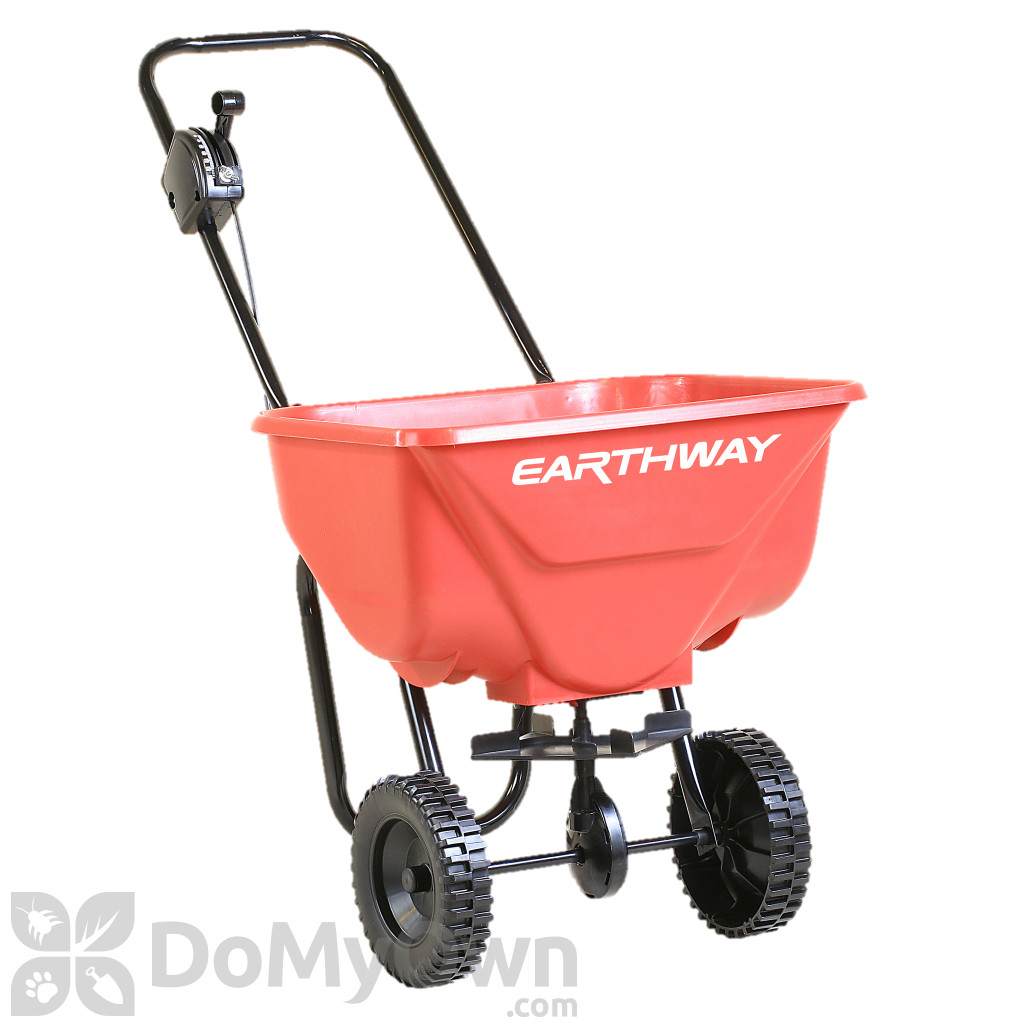
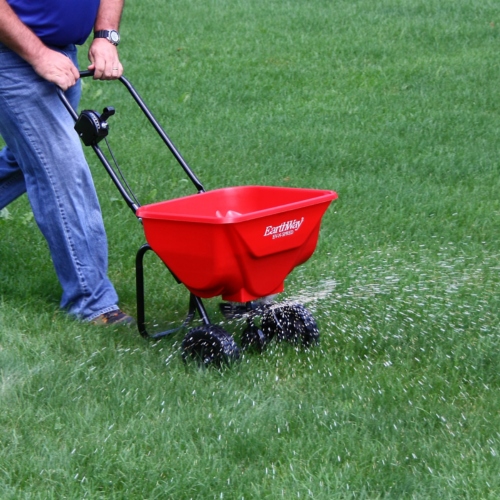
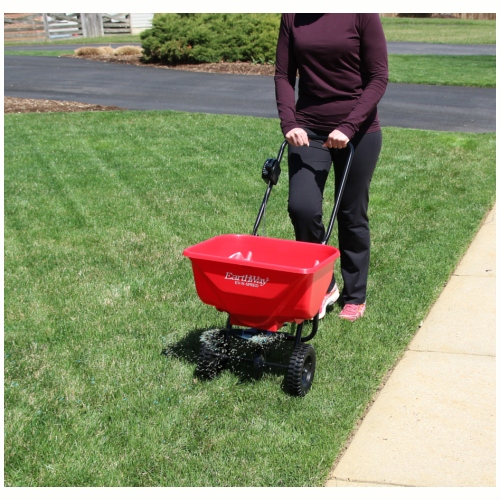
Earthway 2030 Homeowner Broadcast Spreader is an excellent spreader that is perfect for average homeowners that utilize this equipment just a few times a year. It features the EV-N-SPREAD 3-Hole Drop Shut-Off System, along with high-speed gearbox which allows uniform distribution of granular formula. It is constructed of rustproof poly with epoxy powder-coated chassis to ensure durability, plus it is equipped with 8-in. deep lug poly wheels that roll over rough areas with ease. It also has an adjustable rate control that is conveniently located on the handle for easier access. This large capacity broadcast spreader holds up to 65 lbs./30 kg. of granular material.

Features and Specs

For use in Home lawns.
Pet safe Yes, if followed by directions on label.
Dimensions 46 x 21 x 21 in.
Coverage Area Spread width up to 10 ft.
Material / Construction Rustproof poly construction. Epoxy powder coated chassis.
Special Features Adjustable Rate Control located high on the handle for easy use.
Warranty 1 Year Limited Warranty.
Shipping Weight 8.00 lbs
Manufacturer Earthway (Mfg. Number: 2030-SINGLE)
UPC 052732203006

Details

OPERATING INSTRUCTIONS:

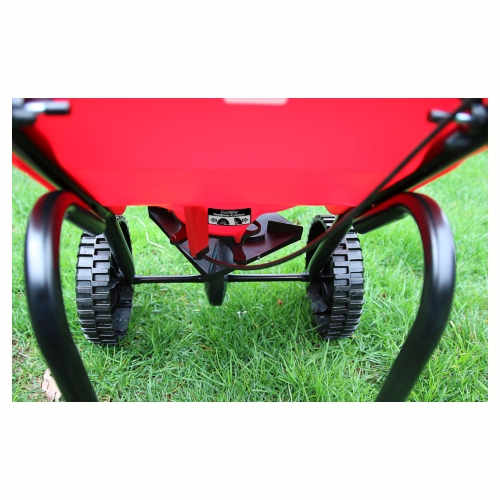
Before filling hopper, become familiar with the operation of this spreader.

  • Obtain proper setting for material to be used from the SETTING MATRIX included with this spreader.
  • Move stop bolt on rate gauge assembly to the proper setting and tighten.
  • While pushing spreader forward, push control lever forward to the stop bolt. To stop, pull lever back to close flow holes before you stop moving.
  • When finished, empty any remaining material from hopper.
  • Thoroughly wash spreader and allow to dry before storing.
  • To prevent corrosion, spray a light oil or Fluid Film inside the tubing of the chassis and on all metal parts.
  • If using Rock Salt, to prevent damage to the gearbox remove salt from the hopper daily. Rock Salt will reconstitute back into a solid block if left in the hopper overnight and will damage your gearbox if operated with the salt in place.

Broadcast Setting Matrix:

EV-N-SPRED Calibration Techniques

How to ensure your spreader is properly calibrated:

Make sure the drop holes in the bottom of the hopper are fully open when the Rate Control handle is on #30. If not, please adjust control cable or control rod to allow for a full open hopper position at #30.

Rod Type Adjustment:

  1. Open the shut-off so that the drop holes are completely open as illustrated to the right.
  2. Review the Control Lever position - if it is set so that the forward edge is at #30, you are calibrated. If not, you need to adjust the control rod at the pivot bracket shown in Fig 1. (See manual)
    • If your shut-off is not able to open fully as in step #1. Loosen the top nut a few turns, then loosen the lower nut so that it allows you to push the shut-off open fully. Next tighten each nut so that they contact the pivot bracket without moving it, and then carefully tighten each nut fully so they do not loosen during use. Recheck adjustment   as outlined in #1 above.
    • If your shut-off is able to open fully as in step #1, but the Control Lever is not at #30. Loosen the top nut a few turns, then loosen the lower nut so that it allows you to push the Control Lever to #30. Next tighten each nut so  that they contact the pivot bracket without moving it. Carefully tighten each nut fully so they do not loosen during  use. Recheck adjust as outlined in #1 above.

Cable Type Adjustment

  1. Open the Control Lever so that the shut-off and drop holes are completely open as illustrated above right.
  2. Review the Control Lever position so that the indicator is pointed to #30, if it is your calibration is correct. If not you need to adjust the control cable at the cable clamp on the underside of the hopper as shown in Fig 2. (See manual)
    • If your shut-off is not able to open fully as in step #1. Loosen the cable clamp screw slightly so that you can slide  the outer cable out so that the shut-off is fully open. Next tighten the cable clamp screw securely. Recheck  adjustment as outlined in #1 above.
    • If your shut-off is able to open fully as in step #1, but the Control Lever is not at #30. Loosen the cable clamp screw   slightly so that you can slide the outer cable in so that the Control Lever opens to #30. Next tighten the cable clamp  screw securely. Recheck adjustment as outlined in #1 above.

(Check the manual for complete rates and settings).

There are no reviews for this product yet. Be the first.

Questions & Answers

Have a question about this product?

There are no questions for this product yet. Ask the first.