Buy 2 or more: $55.91 each
Have a Question? Ask Our Pros!
Average Rating
There are no reviews for this product yet. Be the first.
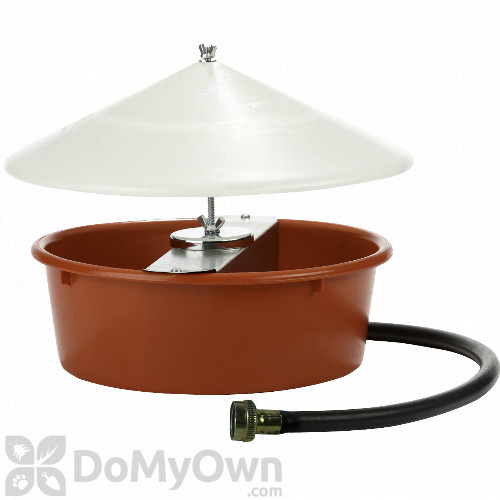
Little Giant Automatic Poultry Waterer with Cover is designed to provide your adult poultry birds with regular supply of fresh and clean water. The cover of this waterer extends beyond the bowl's edge in order to keep debris from getting in the water and prevent roosting. It is absolutely easy to assemble and clean. The bowl of this waterer is molded of high-density polyethylene while the cover is made of white polypropylene and attached to a bracket made of metal. Designed for adult poultry birds and not for baby chicks at all. This waterer can hold up to 5 quarts and measures 14.00 in. long by 12.75 wide by 10.50 inch high.
Product Documents
| For use in | Poultry Houses |
|---|---|
| Application | * See Manual for complete application instructions |
| Dimensions | 14.00 x 12.75 x 10.50 inches |
| Material / Construction | High-density Polyethylene (HDPE) |
| Shipping Weight | 3.55 lbs |
| Manufacturer | Miller Manufacturing Company (Mfg. Number: 166386) |
| UPC | 084369166386 |
PREPARING PAN, FLOAT AND HOSE FOR USE
The metal float cover may be removed to help with the assembly process. (Remove screws and lift them and metal cover out.)
NOTE:
CAUTION:
OPERATING TIPS: If the water flow does not stop.
a. Check for water inside the float. Replace SW23 float if necessary.
b. Remove any debris from valve tip or valve seal and test.
c. Replace SW8 seal and test. Extra seal is provided on the side of the float arm.
d. Check SW20 valve tip for chips or cracks, and replace valve if needed.
PREPARING ANTI-ROOSTING COVER FOR USE (No tools required)
There are no reviews for this product yet. Be the first.
There are no questions for this product yet. Ask the first.