By DoMyOwn staff
Learn how to collect soil samples and get them tested to determine nutrients needed by your lawn.
Just because I could!
Before we talk about soil, I want to show you a few things.
Not sure if that can show up very well but some of the weeds are starting to yellow. It's been about ten days since my pre and post emergent application. So that's telling me that their doing their job. A Lot of the moss in the backyard was a nice deep green, but now it's starting to turn this light yellow green kind of color. Also what's happening, starting to see some green pop up. Granted they're probably weeds, but signs of life are starting to return to the yard.
Soil samples, or soil testing; why should you do it? In a nutshell the reason we do soil samples or perform a soil test is to determine the pH level of our soil or figure out what nutrients has or is lacking. If we figure out those components, we'll be able to figure out later on what kind of fertilizers we're going to need to add to our yard to make it thrive. Now once we get to the actual fertilizing stage of the rehab program we'll go into that a little bit further.
Soil pH is on a scale of acid on the low side and alkaline on the high. A Lot of soils are going to be on the high side or really acidic. And trust me, I have no clue what mean is and I bet you don't either. A soil test is going to tell us what available nutrients already exist in the yard and we'll mainly focus on what macro nutrients it needs. Testing for Phosphorus, Potassium, Calcium, Magnesium, will tell us what kind of amendments we need to add to the soil and what kind of fertilizers to pick out in the future to make the yard really thrive. Are we going to need to add Phosphate, Lime, what do we need? That's what the soil test will tell us. Soil sampling or testing will also tell us if we have some kind of problem going on with the soil. Like disease, or things of that nature.
It's starting to warm up, think I can shed some layers! Much better!
Now let's talk about how you actually get the soil samples that you send in for testing. Now to actually gather your samples, your going to need a few tools first. Nope! Mmmm, nah. Perfect!
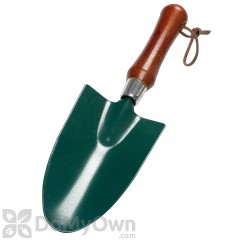
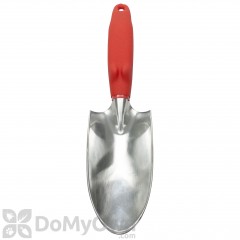
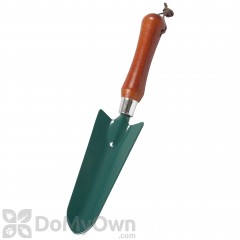
The tools you want to use should be stainless steel or chrome plated. You don't want to use brass, bronze or galvanized materials because those can contaminate your soil samples with copper or zinc. There are soil probes out there designed specifically for soil sampling, but they can get kind of expensive so that's why I'm going to use the spade. It's ten bucks. I'll put my samples in a nice clean plastic bucket as I go. And for those who want to keep their nice dainty little hands clean, gloves. That includes me, I kind of don't like getting my hands dirty.
As for how many samples you should get, aim to get at least eight from all the different areas you're going to be testing. So for my front portion for my lawn here, I'll get maybe like two here in the corner, two over in this corner, maybe two in the middle, and two along the back side there in the different corners. That way I have a good sampling of the entire front yard area. And I'll do the same for along the side, and I'll probably combine those into one sample, so that will be my main portion of my front and left yard where all of my Bermuda is at. As far as the back and right side are concerned, that will probably be another sample that I put into a separate bag when I go to take it to my co-op extension office.
Co-op extension office, let's talk about that for a second. What that is, is usually an office tied to a university, that, for a small fee, will test your soil samples for you and give you report on all of that other stuff we talked about. Soil pH levels, nutrient levels, all that good stuff.
I recommend your local co-op extension office, if they've got a phone number or an email, reach out to them and see if they have any kind of procedures in place to bring in your samples. I called up my local office and the procedure they have, they want me take, again, about eight different samples from the areas I want tested, place them in a clean plastic bucket as I go along, then once I got all of my samples, they told me to dump it out on some newspaper and let it dry out into the sun. Because it's wet or moist they can't really perform a good test.
Some offices will have you print out a form to fill out, or order some special bags to point your samples in. Again, look up your local office, give them a call, shot them an email, see what the procedures are and follow their guidelines.
A couple of other tips when getting your samples, move in a zigzag pattern. So if I start here, I'll move up from here to get my second one, and then back down to get my third, and do that through all the different areas that I'm going to be getting by sub samples from. Also another pointer, if you're going to test a garden bed, keep that separate from your main yard, because they're going to need different nutrients and different types of things to help them thrive.
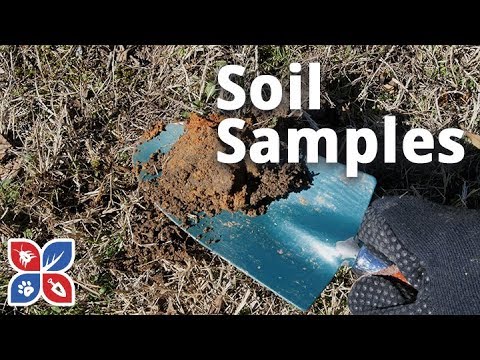
With regards to how deep you need to dig down to get good sample, for main turf lawns like mine, the main portion of my yard, I just need to go about 4 inches down to get a good soil sample.
So...without further delay, let's get started! Cue the music and the montage!
Now as far digging the sample out is concerned, what they tell you to do is dig into a V shape and take out a thin slice of soil to put into your sample. So, what I've been doing is just simply digging down like this, coming in on the other side and doing the same, and then just kind of slicing off that top layer, to get past all the roots and thatch layer, and then just simply pushing down in, bringing up a sample like so, and dumping that into my bucket with all my other samples.
Then I'll just take the top layer that I just peeled off and kind of just pat it back into place. Now its' going to be kind of hard to get all of the grass blades and all the debris out of the soil to get a nice clean sample. Just do the best you can, and get it as debris free as possible.
Now again, per my local co-op extension office, they said to grab a newspaper and take my samples from each section and just simply dump it out, on the newspaper, and let it dry out in the sun so that we make sure it's nice and dry and there is no moisture in the soil. This is also a good time to try and pick through it and take out any debris that you don't want in there, like grass blades or roots or anything like that.
This is the sample for my front and left side of my yard, I'll take a separate sample for my back and right side of my yard because that's got all the moss and there's really not a whole lot of grass to speak of back in those areas. So, I'll just make those two separate samples. After this is good and dry, I'll put the samples into some clean plastic bags that haven't been used before, and then I'll just take them down to my extension office, pay my fee, and wait for the results.
Ok, I've had them drying for couple of days now. They baked in the sun for about half a day, but storm clouds were rolling in and I had to pull them in out of the rain, so I brought them in here to the garage so they could finish drying out over the weekend. Now I'm just going to bag it up and label it, and take it to the extension office. Back yard! Front yard! Ready to go!
It is a significantly cloudier next day after dropping off my samples at the extension office. I tried to take the camera inside so you could see what it was like, but, they didn't like that to much, so... Extremely nice people at the co-op extension office! They were very pleasant and very informative and helped me out. Got me in and out of there really quick. I just had to pay a small fee of 16 bucks, and it should take them about 10 to 12 days to get the results back.
One more tid-bit of information I want to give you about the soil in your yard or on your property.
Something we can control is the amount of nutrients in the soil. Which is what this whole test was about. You'll hear people refer to it a soil amendment or amending the soil, something along those lines. Because what they're doing is they figured out what the yard needs by performing a soil test and they're adding nutrients back into the yard so that they can make it thrive.
So that's it for this one! Not a whole lot to it just really a good excuse to play in the dirt! You're never too old for that.
If you have any other questions about soil tests or soil samples or analysis or amendments, all that good stuff, you know what to do! You can leave the comment section of this video, you can pick up the phone and call our customer service staff, or just shoot them an email.
If you click this "i" icon in the upper right hand corner, it will take you over to our website where we got a bunch of other information on lawn care in our lawn care guides. Make sure to keep following along with us by hitting this subscribe button. You can hit this playlist to look at the other videos in the series to catch up on everything we've done so far in the rehab program.
Hope you found this video helpful! And as always, thanks for watching!